Valeria Gasparrini
Artist, illustrator

About
Valeria Gasparrini ( Rome, 1964), was formed thanks to a rich contribution of artistic and literary experiences: classical studies, research in ceramics, painting, fresco, engraving, drawing from life; attended the three-year course of illustration at the IED, and was trained in the graphic engraved at the Stamperia del Tevere , in Rome. Today she works as an artist, as an advertising illustrator and freelance editorial, as a teacher of drawing, visual and illustration at Quasar Design University, the Academy of Fine Arts of L'Aquila ABAQ, the American University in Rome AUR. He draws live in theatrical performances, and realizes performances with stage machines of various nature that builds and animates on stage. As an artist he has participated in personal and collective exhibitions, and passionately dedicates himself to the creation of artist’s books, combining his remarkable illustrative nature with the infinite expressive possibilities of engraving techniques.
He has exhibited in Rome, Milan, Bologna, Faenza, Venice, Paris, Luxembourg, Rothemburg. Some of his works are part of permanent exhibitions, such as the ceramic work "Rain" at the International Museum of ceramics in Faenza, the artist book "How many irreplaceable lives", exhibited at the national library of Luxembourg, and its printed version exhibited at the Casa della Memoria in Rome.
They wrote about here
Daniele Scalise, Loris Schermi, Francesca Tuscano, Michèle Wallenborn, Devin Kovach, Sarah Linford, Gianluca Tedaldi. Valeria Bertesina.

For interested people,
I am writing to offer the highest recommendation for Valeria Gasparrini who has held two engraving workshops for the Rome Center of Architecture and Culture at Woodbury University which I direct. He guided the students' works, taking them from the initial drawings to the creation of the definitive prints and their possible display in an exhibition. I find her one of the most creatively contagious and inspiring people with whom I have had the opportunity to collaborate.
Let me take the liberty of offering a few details regarding his remarkable abilities. To begin with, she is a very competent artist in her field. She is also generous in sharing her experience and does so with great enthusiasm.
In the initial phase of the projects he offers numerous approaches, both experimental and conventional, with the aim of giving birth to works of art that can then be created on slabs.
In the workshops we used zinc and copper plates, and the results were surprising. It featured field sketching exercises, complex mapping projects, and digital plate file translations. It has provided Woodbury with some of the most powerful and transformative learning experiences students have had in Rome; also in relation to what they do at home. Our students love her and she has been there for them every step of the way, teaching them techniques to achieve their creative goals.
It is a magical moment when the students complete the drawings, prepare the plates, ink them working in their studio. And then they print them. This would not have been possible for us without Valeria's expertise.
Thank you for the opportunity to offer a great recommendation for Valeria and I would be happy to discuss her merits further should you wish to contact me at my email: paulette.singey@gmail.c
Best regards
Paulette Singley
Woodbury University professor,
Director of the Rome Center for Architecture and Culture
Scrapeboard technique
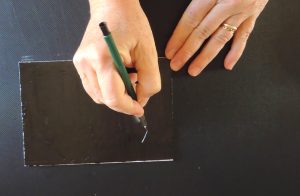
The scrapeboard is a board covered with a thin layer of chalk or clay, the surface of which is painted black. Scratching with a tip the surface you get white lines on a black background, the thickness of which varies depending on the tip that is used. You can buy already prepared or you can do it at home, accepting the limitations that derive from it :), but being able to realize variants that are not on sale.
How to make a homemade scrapeboard
Medium difficulty, realization time one hour plus drying time: 1.5 h + 8h + 15 min.
Equipment needed: paper scotch team box cutter ready-made putty for wood or wall pencil flexible steel spatula, sometimes called scraper ink brush to spread the ink (the shape has not excessive importance) pressed cardboard thickness 2mm more or less sandpaper fine grain, grain (roughness) about 220 serrated kitchen knife
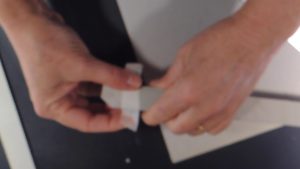
1) Cut 4 thin strips of cardboard and join them two by two with scotch (to cut a thick card, it is better to make several times a light cut)
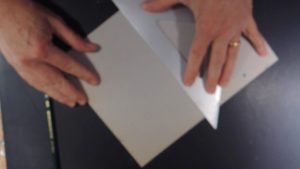
2) Cut the cardboard, not too large (20 x 12 cm is a good size); the larger it is, the harder it is to spread the grout evenly.
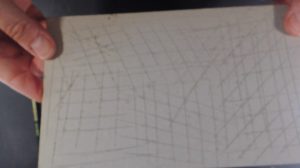
3) Scratch the surface of the card with the knife.
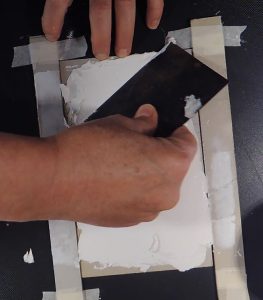
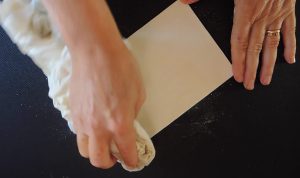
4) Spread a certain amount of putty with the knife, make it stick well. It is a bit like spreading butter on a slice of bread.
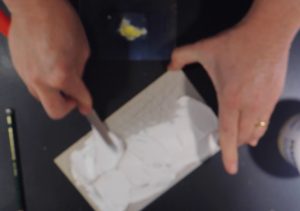
5) At this point use the spatula, which has a larger surface;
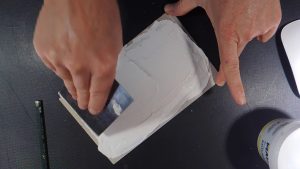
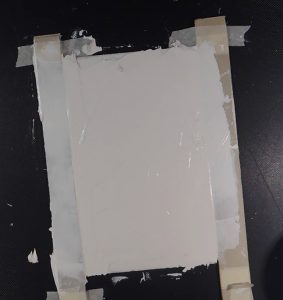
6) Place the two strips obtained at the beginning on the sides of the card, secure them with scothc. The two strips on the sides act as thicknesses, and this allows to obtain a uniform layer of putty. If you want to get a thin or thicker layer of putty, you have to work on the strips of cardboard that you have cut and assembled.
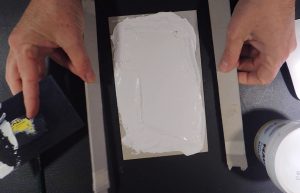
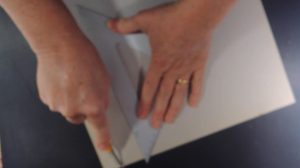
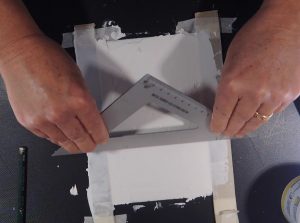
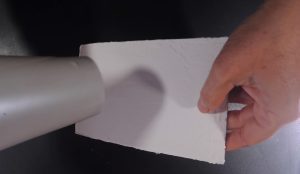
7) Level the grout using the square; the ends of the square rest on the two thick strips. If you want, at the last pass wet the team to make it slide better. The team holds better than the line, but the concept is the same.
8) Carefully remove the two strips and wait for the grout to dry well. The cardboard base will board because it has taken moisture; we will straighten it drying, but the tendency to board will remain 🙁

9) When it is dry enough (about an hour and a half), you can help with the hair dryer.
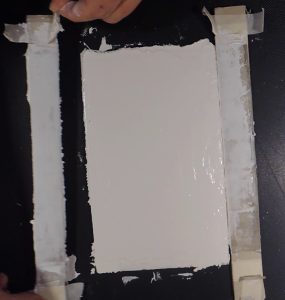
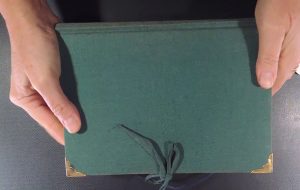
10) Put it under pressure to return it straight. After about 8 hours it will be dry.
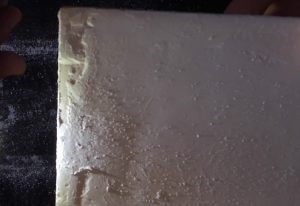
11) Unwrap the surface with fine sandpaper. A good grain is 220 gr.

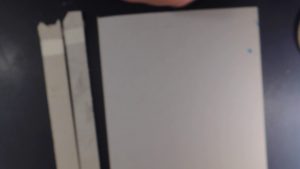
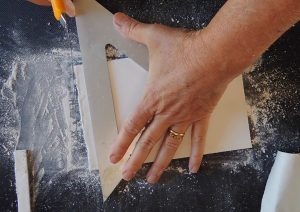
12) Probably on the two sides that did not have the thicknesses the application of the grout will not be uniform; in this case you can trim the cardboard. To trim the cardboard, make more light cuts at the same point, without pressing too hard.
13) Remove grout dust with a damp cloth
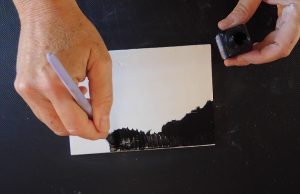
14) Paint with India ink*
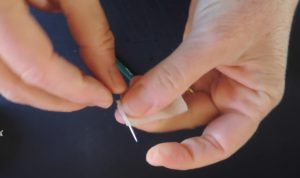
16) A good tool for scratching is a pencil pencil in which you will insert the tip of a compass, reinforced at the base with paper scotch to give it greater thickness.
To make a scrapeboard
Step by step how to make a scrapeboard at home, with a few simple materials.
